Showing posts with label gluten-free. Show all posts

Saturday, October 23, 2010

I STILL HAVE A BLOG!

Hi everyone! It hasn't quite been a month since my last updated. I feel like I've been neglecting you all! I haven't, really; I've just been so busy with school this semester. Taking three writing classes is definitely do-able, but it's a whole lot of work! It's a damn good thing I don't have a job or anything. I'm right in the middle of midterms right now--last week I had to write an essay and two short stories, which doesn't seem like that much, but I put a full workday into one of those short stories and it's only a draft. (Everything is only a draft right now.) And much to my surprise, I'm totally rocking my Statistics class. Hooray!

Anyway, that's my life for now, and I have a recipe for you! I made this so long ago. I have so many things piled up on my camera that I stopped taking pictures of new things because they just weren't getting done with school. And I haven't had much time to cook, though I roasted a chicken for the first time ever a few weeks ago. This was made for my mom's birthday in August. It is yet another of Patricia's recipes over at Technicolor Kitchen--I'll admit, I have a total blog crush on her.

After my (arguable) success with the Strawberry Balsamic panna cotta, I was excited to try something new, but I generally have difficulty with the idea of making desserts just because. Unless it's something really easy--which it turns out this is! But unless I have all the ingredients on hand and it's only going to take a little while (like those peanut butter cookies*), chances are, I won't randomly make it. I'll wait for a special occasion of some sort, and given how much my mom loves Nutella, this seemed the perfect thing to do for her birthday.

RECIPE: Nutella Panna Cotta
not adapted at all from Technicolor Kitchen

Ingredients:
-1 tbsp powdered gelatin (I would imagine you could safely use less if you're not unmolding them)
-1 cup of Nutella (it's a lot of nutella)
-1/4 tsp salt
-1 1/2 cups heavy cream
-1/2 tsp vanilla extract
-1 cup whole milk

Instructions:
1. Whisk together the gelatin and 3 tbsp cold water in a medium-sized bowl. (Don't do it in something tiny--you'll be adding stuff to it.)
2. Put the nutella and salt in a different medium-sized bowl.
3. Pour the heavy cream and vanilla into a medium-sized saucepan, put it over medium heat, and bring to a simmer, stirring frequently.
4. Pour about a third of the vanilla and cream mixture into the bowl with the gelatin and whisk it together, then add that third back into the saucepan.
5. Pour about a third of the vanilla, cream and gelatin mixture into the bowl with the nutella and whisk until smooth. Add the rest of the vanilla-cream-gelatin mixture and whisk until smooth again, then add the milk and do it again.
6. Divide this mixture between ramekins or glasses or cups. Patricia says 8. I say 6-8. I think six would be a large amount, but it wouldn't be absurd. Instead of doing this, I saw that she put hers in teacups and thought it was adorable and I should do the same. Unless you have really small teacups, don't do this. You'll probably get sick. Divide it evenly between 6-8 different containers.
7. Refrigerate until set, then eat!

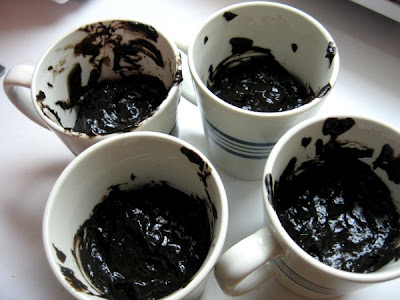
The end of Step 5: This recipe goes pretty quickly and I was cooking alone so I wasn't able to get pictures of all the earlier steps, but honestly, they would have been really boring. This is panna cotta in liquid form! I was amazed at how easily the nutella melted into everything else.

Right before eating. These teacups are deceptively large. The adorable pinkness and print always makes me think they're dainty little teacups, but no. Don't fill a teacup this size with panna cotta unless you really really want to binge on panna cotta. Of course, I'm stubborn, so once I started eating it I had to finish. Luckily I didn't feel all that disgusting afterward, but I'll definitely put it in smaller containers next time.

So...is it okay to talk about medical things on here? I hope so. I mean, it is MY blog. One reason I've been cooking less recently is because I have an ulcer (my doctor called it "peptic ulcer disease" but that sounds really bad, so I'm just saying an ulcer). I haven't been forbidden from any foods except soda, coffee, aspirin and advil (yes, aspirin and advil are foods) because different things irritate different people, so the best thing to do is apparently to eat stuff and then don't eat it again if it hurts you. However, this thing is friggen' painful. So if there's any chance that what I'm about to eat might cause a lot of pain, I'm avoiding it. Unfortunately, pretty much every food ever is potentially bad for an ulcer. If you look at that list, you may notice "garlic" is on it. And on the non-foods list of things you're not allowed to have with an ulcer is "stress." (Oh! Hi, midterms!) Unfortunately, a lack of garlic causes a lot of stress for me. Because of this and other similar problems, I've been ignoring the list and mostly just avoiding things that sound painful, but most of my "you should make this recipe" folder sounds sort of painful, so I'm restricted.

Does anyone have recommendations about what to eat with an ulcer that still has flavor?

Anyway, sorry for the medical stuff, and I hope you make the panna cotta! I would not be afraid to eat this right now, and it's super delicious. How can anything with nutella not be?

Friday, September 24, 2010

Taste&Create: Chicken Creole

It's time for this month's Taste&Create! This month, I was paired with Becky of Baking and Cooking, A Tale of Two Loves. I went through her archives and found that her very first recipe, "Sunday Chicken Creole," is exactly the type of thing I would do if I knew anything about 1-pot cooking, which I don't. But looking over the recipe, I was pretty convinced that I'd love it: peppers, tomatoes, onions and garlic. I mean, that's how I cook. So I'm pretty sure this is at the last minute (or perhaps even late--which I feel bad about, but my classes are INSANE this semester; I think I'll be not doing Taste and Create for the next two months).

So basically, this is an extremely easy meal. And people around me are talking too much for me to type (and I'm in a huge hurry, as usual), so here's a recipe and some pictures!

RECIPE: Chicken Creole
adapted very slightly from Baking and Cooking, A Tale of Two Loves

Ingredients:
-4 large chicken breasts
-3 tbsp olive oil
-2 cups chopped red onion
-2 small green peppers, chopped
-4 sticks celery, chopped
-5 cloves garlic
-2 tbsp chili powder
-2 tbsp paprika
-1/2 tbsp smoked paprika
-2 28-oz cans whole tomatoes in puree (Cento's San Marzano tomatoes are in puree; I found that they generally didn't say what the tomatoes were in unless you looked closely at the ingredients. If you can't find them in puree, drain the liquid and use a can of tomato sauce.)
-1/2 cup white wine

Instructions:
1. Chop the peppers, onions and celery. Put them and the minced garlic in a large stockpot with the olive oil and saute for three minutes.
2. Add the paprika, smoked paprika and chili powder and cook for another three minutes.
3. Put in the wine, tomatos, black pepper and chicken. Simmer for 35 minutes until the chicken is cooked thoroughly.
4. Serve over rice.

Step 2!

Also step 2! This smelled so good. I'm just discovering a love for paprika--it's so exciting!

Step 3: It's almost done! Yay!

You can't even see the rice. I should have made more, but this was delicious! I was happy with how it came out.

I tend to chop everything up and mix it together. It worked pretty well for this. The chicken was super tender and all the flavors had fully permeated everything. It was delicious!


Hah! Simple. Dinner that takes less than an hour, and it's so easy for a weeknight when you don't have a lot of time. Which I don't. And even the blog post didn't take much time! YAY! Mike and I are off to see Cabaret now, so go check out Becky's blog--she's got some great recipes on there! (She's got bacon cupcakes in there somewhere, too!)

I hope everyone has some exciting plans for the weekend! I'll be doing statistics homework and writing papers, so I'm glad I'm at least starting it out on a good note!

Monday, September 20, 2010

Yaki Onigiri--Japanese Fried Rice Balls

This is another one of those recipes that I grew up eating. My uncle moved here from Japan. I'd love to say that this means I grew up familiar with lots of different Japanese foods, but really it means I learned how to say "I farted" in Japanese at a very young age, tried to eat a sheet of seaweed once and thought it was disgusting, and got really excited whenever yaki onigiri (which I always just called rice balls) were part of dinner when we were visiting them. I don't clearly remember the rest of the dinner; the rice balls were the key component. I'm sure there were Japanese elements to the dishes, but we never ate something that I thought was really weird (at least, until I was old enough to appreciate it).

I decided at some point to make the rice balls I remembered from my childhood myself. I thought it would be hard to figure it out; luckily, I remembered what the Japanese name for them was and a quick Google search was all I needed to find sufficient instructions, and from there I discovered that the method itself is extremely simple. I wouldn't say I've mastered the technique--I mean, I've made them once. They burnt a little bit, and when I told my uncle he told me that I should make them on the grill next time (well, I guess that'll have to wait until next year--it looks like grilling season is just about over). They were, though, the thing I was looking for.

Yaki onigiri are densely-packed balls (or triangles, or whatever shape you feel like) of sushi rice, grilled or pan-fried with a bit of oil, brushed with soy sauce. That's it. They're such a simple concept, but the flavors involved blend together, the outside forms a nice crunchy shell and the inside somehow becomes almost creamy in the cooking process. Granted, I've never just eaten plain onigiri, but I don't usually think of rice as creamy (not even the rice wrapped around the sushi I get, which I imagine is what I'm using here) so it's an interesting juxtaposition against what you expect. Apparently it is fairly common to get (or make) these stuffed, as well, which would add another layer of complexity that I'm not quite ready for (and don't really feel is necessary).

RECIPE: Yaki Onigiri

Ingredients:
-Sushi rice, prepared according to instructions on package (note that sushi rice is NOT cooked by the "normal" rice ratio of 1 cup rice to 2 cups water; my bag had me use 2 cups rice to 2 1/2 cups water), as much as you want to make
-Cooking oil (I used extra virgin olive oil because it's what I have; a vegetable or peanut oil would probably be more authentic)
-Soy sauce or tamari

Other Requirements:
-a bowl of cold water
-a basting brush of some sort
-a grill or frying pan
-onigiri molds or cookie cutters (totally optional)

Instructions:
1. Prepare sushi rice and roll into balls. (Make sure your hands are dipped in cold water to prevent the rice from sticking to them.)
2. Put in a hot, oiled frying pan or grill for a few minutes until lightly browned on one side.
3. Flip. Brush with soy sauce. Allow to lightly brown on this side, too.
4. Flip. Brush with soy sauce. Cook for about 1 minute.
5. Flip. Cook for about 1 minute.
6. Remove from pan.

Step 1: Sushi rice, just finished cooking, fluffed with a fork.

Also Step 1: The rice was too hot to touch at first, so I packed it into little heart-shaped cookie cutters with a fork. It took SO much time that it probably wasn't worth doing, but if I do it again, I'll pack it denser next time.

Step 2: in the pan. This is what the rest of mine looked like. Apparently "round" isn't the traditional shape, but it's what I'm used to and it's tasty, so I can deal.

Step either 3 or 4: Lightly browned and brushed with soy sauce. This side still has to cook for a tiny bit more.

Post-Step 6: The "Eat" step. They're a tiny bit darker than they should be, but they were still super tasty. I love crunchy rice.

Wow! Okay, that was super simple. If you're cooking a lot of them at once, the brush-then-flip thing can get sort of tricky and you'll have to move quickly, but other than that this is easy. Note that it's best to roll the rice into balls as soon as you can after it's done cooking. The site I found these instructions on used cookie cutters as molds, which I found worked really well right when the rice finished--I could use a fork to pack the cookie cutters without burning myself. If you do this, make sure both the fork and the cookie cutter have been rinsed in cold water first. When it comes to the soy sauce, I would recommend not drenching the rice in soy sauce unless you and everyone else you're cooking for really really likes soy sauce. It's a lot easier to just brush a little bit on and leave the bottle on the table for people who want more than it is to make a whole new batch if someone thinks they're too salty.

Yaki onigiri can be made as large or small as you like, in whatever shape, with whatever filling and whatever amount of soy sauce. They're actually quite versatile when you consider that it's just rice! They work well as either a side dish or an appetizer, or even a meal if you're lazy and don't care about getting proper nutrition. They're also finger food! Eat them with your hands. It's important.

I served these with my peanut-sauce panko pork chops and they were delicious together. I bet pretty much any recipe that involves some sort of Asian fusion element would do well with these as a side or appetizer. I also ate them cold for breakfast the next morning, which was just as wonderful.

School's already keeping me super busy (well, and for some reason I've had busy weekends). I'm trying to cook and update but it's hard to find the time! I hope you guys forgive me. I think it'll be easier once I settle into a schedule (and start reading some of my new cookbooks!). Right now, I'm trying to enjoy the last few days of summer, but also wishing the weather would make up its mind! It's at that point where it's getting cold at night so when I leave in the morning I want long pants and long sleeves and a sweatshirt but I'm dying by the time I get out of my first class. How is everyone else enjoying their last moments of summer?

Thursday, September 9, 2010

Chocolate Pudding, College-Style

So my classes started up yesterday. Hooray! I'm actually excited. So far, I like them all. Then again, I've only had 3 (out of 5) and only one session of each of those, so I might be completely wrong. I'm probably going to be super busy this semester with all my writing classes, but I'm going to do my best to update here at least once a week. Which really just means cooking something new at least once a week, which I'm usually good at. Recently I've been lazy. I blame knowing that school was about to start and allergies. Anyway.

Since I commute to school, I don't suffer from cafeteria food the way that most college students do. There was, though, a time when I lived in a dorm and had to eat at the dining hall for every meal. Our dorms didn't have any kitchenettes or anything, either. All we had was a refrigerator (mine was usually filled with Mountain Dew) and a microwave (for making Annie's Microwaveable Mac & Cheese). No toaster. No stove. Darkness, desolation. Borderline starvation. (Okay, so I'm exaggerating here, but you get the point.) I wasn't as into cooking then as I am now--I always liked cooking, but I never spent time clicking around the internet looking for new things to make. Which is good. If I had, I would have become increasingly disappointed that I couldn't make anything. So today, I'm going to share with you all something I could have made back then, and something that those of you who are in college and don't have access to much in terms of appliances can make now.

A few weeks ago, I was bored on the internet and saw something that mentioned chocolate pudding. I'm not sure why, but I pretty much immediately needed to make chocolate pudding. I was about to go search for recipes when I thought, "Wait, I'm at Mike's house. He doesn't have things like heavy cream and a double boiler to make pudding with." I almost didn't even look, but I remembered that I had a little bit of cream left there from a cake I'd made, and maybe--just maybe--it would be enough to make pudding. Boy, was I surprised when I found that the top chocolate pudding recipe on Food.com didn't use cream at all. In fact, it called for skim milk. The total calories from fat in one serving of this recipe is seven. Seven calories from fat. In PUDDING. So not only can you make this in your dorm room, but you won't get fat if you eat it every day.

If you're at home, and you really don't feel like making stuff in a microwave, you can do this in a double-boiler. It's really not necessary, though. This was excellent pudding.

RECIPE: College Kid Chocolate Pudding
very very slightly adapted from food.com

Ingredients:
-1/3 cup sugar
-1/4 cup cocoa powder (I used Hershey's Dark cocoa powder. It's not any more expensive and it tastes SOOOOO good. If you like dark chocolate, I highly recommend it.)
-3 tbsp cornstarch
-1/8 tsp salt
-2 cups 1% milk (I know I said the recipe calls for skim, but I prefer to write what I actually did, and we drink 1%--use skim if that's what you have.)
-1 tsp vanilla extract (optional--I left it out because by the time I was supposed to add it, the pudding was way too thick.)

Instructions:
1. In a large microwave-safe bowl, mix sugar, cocoa powder, cornstarch and salt. Make sure you mix thoroughly. If the cornstarch isn't incorporated into everything else, it'll clump when you add the milk and not come apart and your pudding won't thicken.
2. Add the milk and whisk (with a fork, if you don't have a whisk, which I imagine most college kids don't.)
3. Microwave on high for 3 minutes. Remove and stir.
4. Microwave for another 2-6 minutes, for one minute at a time, removing and stirring after each minute. (The original recipe says 4-6 minutes. I thought it looked plenty pudding-y at 2, though, and after 4 it was too thick to add the vanilla.) When it's thick enough, add the vanilla and stir it in.
5. Separate the pudding into 4 dishes (bowls, coffee mugs, solo cups, whatever) and refrigerate until cold.
6. Serve, topped with whipped cream (if you have it or can steal it from the cafeteria) or just normal cream (if you have it; you probably can't steal this one).

Step 1: Dry ingredients in a bowl.

Step 2: After you add the milk, the dry ingredients will probably make it look really foamy, almost sponge-y. This might also be a side-effect of using the whisk instead of a fork. Regardless, it's okay.

Step 3: Action shot! I wanted to capture how it looked a lot darker under the thin layer of bubbles. This is right after it came out of the first 3 minutes of microwaving.

Step 4: This is after 4 minutes of microwaving. I don't think it needed to be this thick, but it was delicious, so I guess don't hesitate to over-thicken it if you're not sure.

Step 5: I like my pudding in coffee mugs. And if you're a normal college student, you probably have a few of them lying around. The important thing here is, I know there are people out there who can put pudding into serving dishes without making it look like a complete mess. Would any of those people like to volunteer to teach me? Because I clearly need help. (Though, fellow college kids, you probably don't have to worry about what it looks like. Anyone you're feeding this to should be happy enough just to have homemade pudding.)

So there you have it. The easiest pudding to make, EVER. Were you confused when I said you can serve it with just cream? Because Mike was sort of confused when I poured some cream onto mine. I'm not sure why I do this except that I grew up doing it, and I think it tastes wonderful. It's exactly like whipped cream, except it hasn't been whipped yet.

The ingredients and supplies necessary to make this would easily fit in one cube of those wire-grate-assemble-it-yourself shelving units that I know you have in your room. It would probably cost under 10 dollars to be able to make this a bunch of times. And that guy or girl you're after will probably be totally impressed that you made pudding in your dorm room, so it's worth it.

Tuesday, August 24, 2010

Taste&Create: 4 Ingredient Peanut Butter Cookies


Hi everyone! Look at me, blogging on a Tuesday like I'm supposed to. I was super excited to be paired with Dragon Musings for this month's Taste&Create. She has 3 kids, I believe, and does a lot of cooking with them that results in some pretty awesome things, like stegosaurus shaped calzones (which I can't find right now but I love dinosaur-shaped food so they must be delicious). She also posts a new flash game every Friday, which frequently consumes my weekends if I'm not careful, and menu plans on Monday which cause me to admire her ability to plan out what she's going to eat. I definitely can't do that. So check out her blog, but first look at how AWESOME these cookies are!

She emailed me to ask about my peanut butter and chocolate chip banana cookies, since she lives in Australia and they don't have peanut butter chips there. I, sadly, didn't know how to go about replacing things with peanut butter to get both tastes in there, but I asked her to let me know if she figures it out because I've been looking for a good peanut butter cookie recipe. She responded pointing out that she'd just posted a peanut butter cookie recipe the day before. Apparently I'd been too distracted to check my RSS feed, because I definitely would have noticed that, but I checked and was super excited to see that she had, and that they looked like the peanut butter cookies I remember eating when I was a kid. So here's the recipe! It's the most amazingly easy thing I've ever made. If you screw up every food that you ever cook, you can make these and they will be perfect. Just trust me.

RECIPE: 4-ingredient peanut butter cookies

Ingredients
-1 cup peanut butter (the kind with lots of ingredients, like Skippy or Jif, not the kind that is just peanuts or peanuts and salt)
-1 cup sugar
-1 tsp cinnamon
-1 egg

Instructions
1. Preheat the oven to 350 degrees F.
2. Put all the ingredients in a bowl and mix them until they reach an even consistency.
3. Roll them into balls and place them on a cookie sheet lined with wax paper. Squash crisscrossed fork marks in them (as pictured below).
4. Bake for 8 minutes.

Step 2, part 1: put everything in the bowl.

Step 2, part 2: Mix everything until it looks like this.

Step 3: roll into the balls so they look like the balls here, and then squash with a fork so they look like the fork-squashed ones here.

Right out of the oven. Isn't that the most gorgeous peanut butter cookie you've ever seen?

I was SO impressed with this recipe. Not only is it incredibly simple, but it tastes exactly like a peanut butter cookie should. The consistency is very cookie-like, which I didn't expect given the lack of flour--Mike just ate one and asked me how they seem so cookie-like without any flour. So, other bonus: gluten free! (Assuming the peanut butter is gluten free. I'm not sure. I couldn't find anything on the label saying it was, but I couldn't find anything saying it wasn't, either. And I'm sure if it's not there are brands out there that are.) The whole thing took probably 20 minutes, and most of that was fork-squashing because I'm a bit of a perfectionist.

The only problem I had with this recipe was actually the cinnamon. I feel blasphemous even saying that--anyone who knows me knows that I put cinnamon in EVERYTHING and a teaspoon of cinnamon in a pie recipe translates to two tablespoons, but it was sort of weird with the peanut butter flavor. I think, though, that this is my fault--it was only weird for two cookies, so either I got used to it quickly OR I should have mixed the cinnamon and sugar together first so that it was evenly integrated. Whoops. I should know to do things like that by now. I'm pretty sure that the cookies that tasted too strongly of cinnamon just had a higher concentration of cinnamon in them than the others and it would be fixed if I followed normal baking protocol instead of getting excited to take a picture that clearly showed the four ingredients. Oh well.

So go make these! You probably have all the ingredients. I got 17 cookies, so it doesn't even make so many that you'll have to give them away or get sick from eating only cookies for the next few days. And don't forget to stop by Dragon Musings and check out her flash games...er...recipes and such.

Tuesday, July 27, 2010

Panna Cotta with Strawberries and Balsamic Vinegar

Wow, it's been a while since I posted a dessert on here! I don't actually make dessert all that often--in the summer it's too hot and we just go out for ice cream, and when I'm in school I don't have a lot of time. However, there are sometimes special occasions that call for homemade dessert--birthdays, holidays, sales on fruit, and most importantly, realizing that something you can get at your local farmstand is about to go out of season and then you'll have to get it at the grocery store and they won't be quite as delicious. I made these when the strawberries were about to go out of season, which means I'm about a month behind in my posting things. (I like to have a buffer of pictures, though, so don't expect this to change!)

I made this panna cotta (my first!) for our belated Father's Day celebration. Generally I'm the pie person in the family, and anytime I'm bringing a dessert pie is requested, but since this was a week after my cousin's graduation (for which I made three pies and a gluten-free crumble), I was all pied out and wanted to make something different. I'd seen panna cotta on a few blogs and was curious--partially because it was Italian, partially because I'd never made it before, and partially because it sounded like a perfect summer dessert: cold, creamy, and refreshing. It was also surprisingly simple to make and required very little heat--the stove for a few minutes, but that's it. Perfect! This particular recipe caught my eye because it seemed different--balsamic vinegar in a dessert? I was intrigued, and I know my dad and knew that even if it came out terribly, he'd appreciate the concept.

RECIPE: Panna Cotta with Strawberries and Balsamic Vinegar
Adapted (very slightly) from Epicurious

Ingredients:
-2 tbsp water
-1 1/4 tsp unflavored gelatin
-2 cups whipping cream
-1 1/4 cups plain greek yogurt
-1 tsp vanilla extract
-1/2 cup sugar
-1 quart strawberries, hulled and sliced
-3 tbsp balsamic vinegar
-1/4 cup sugar
-freshly ground pepper, to taste

Instructions:
1. Put the water into a small cup and sprinkle the gelatin on top of it. Let sit about 15 minutes.
2. Put half the whipping cream, the yogurt, and the vanilla in a bowl. Whisk until smooth.
3. Put the remaining 1 cup whipping cream, along with the 1/2 cup sugar, into a small pan on medium heat. Stir until sugar dissolves and cream comes to a simmer.
4. Take the pan off the burner (or if you have a gas stove, simply turn the burner off) and add the gelatin (which will now be a solid squishy disc). Stir until dissolved. Add this mixture to the yogurt mixture in the bowl and whisk until thoroughly combined.
5. Divide between six ramekins or small cups (I used those little plastic chinet cups. I also only divided into 5, because that's how many people there were going to be, and it seemed silly to have one left over.) Refrigerate for a few hours until set, can be refrigerated overnight.
6. Make the strawberry sauce: combine sliced strawberries, sugar, balsamic vinegar, and a few grinds of pepper. Toss. Let sit for a while.
7. If you want to unmold the panna cotta, dip each cup into really hot water and flip it onto a plate, and then wiggle the cup around until it comes unstuck. You don't have to unmold it--in fact, for this recipe, I recommend against it, but if you want to you should definitely read at least through the picture captions, because it's important.

Step 2. This doesn't really require much explanation.

This is also step 2. See how it's nice and creamy and smooth? That's good. You want that.

Steps 3 and 4. When melting the sugar into the cream, it had a distinctly darker color and made the cream look very off-white. I think this is normal and okay, because it definitely didn't smell or taste burnt. Once you put the gelatin in (that round thing there), stir it gently as it dissolves and watch it disappear! It's like you did a magic trick.

I got a little worried when I saw the five individual cups and realized I needed to transport them, but a cupcake pan worked great! The cups were a little bigger than the...uhhh...cupcake-holes, but it held them upright and they survived the (very short) trip.

Uh...plop? I wanted to unmold them, but I expected that they'd hold their shape when I did. I'm not sure if this is my fault or the recipe's. The recipe said to refrigerate overnight, but I read a lot of other panna cotta recipes and they all said to refrigerate for a few hours. I went with a few hours. That might be the reason it plopped. However, I think it's much more likely that this is a recipe that is not meant to be unmolded--the ever-helpful Technicolor Kitchen posted a similar-looking panna cotta recently which called for 2 teaspoons of gelatin and said to use less if you don't plan to unmold it. (She also said that less gelatin tastes better, so maybe leaving it in the cup is the best option.) I want to try making this again and using the two teaspoons and see how it comes out. So: if you plan to unmold your panna cotta, you either need to refrigerate overnight or use more gelatin and I'm not quite sure which it is but I think it's the gelatin.

You may remember in my asparagus risotto post that I said I had two recipes from Epicurious that I wasn't satisfied with--granted, neither of the dissatisfactions had to do with taste, simply with their instructions. Assuming that the gelatin is the problem, I would have liked to see something saying to use a different amount to unmold it, especially considering that panna cottas are frequently served this way. Really, though? It tasted so good that I almost don't care. I'm going to try more gelatin just to see if my theory is correct, but if it's true that it doesn't taste as good, I'll eat my panna cotta in the cup from now on.

If you're serving this to kids or people with kid-like palates, you can separate out some of the strawberries after you add the sugar and before you add the balsamic vinegar and pepper. Mike and Mia both ate theirs with just cinnamon and sugar on their strawberries. It's super easy. It also probably doesn't need the amount of sugar I put in--the original recipe said to use one tablespoon, but I was worried that the balsamic would be overpowering and there wouldn't be much sweet. I loved it how it came out and though I would probably use a little less next time, I'd stay closer to my amount than theirs. I'm also not sure if the additional sugar is responsible for how soupy the strawberries got--does more sugar make strawberries bleed more? And is there a better word for this than "bleed"?

So, making this, I discovered two things: first, panna cotta is simple and delicious, and second, the strawberry and balsamic combination is really really good. I've only heard of it in terms of balsamic vinegarettes on salads with strawberries before, and it never occurred to me that the two would be so good on their own (well, with a lot of sugar).

Do you guys have any unexpectedly delicious combinations of flavors that you love? What are they?

Tuesday, July 20, 2010

Asparagus Risotto

A while ago, a couple of the blogs that I follow posted recipes for asparagus risotto. I've never made a risotto before--well, not a REAL risotto--and I absolutely love asparagus, so of course I absolutely had to make it. I went searching for recipes all over the place. Though I didn't really know how to make a risotto, I felt very strongly that it should include more than a tablespoon of cheese and/or cream, yet that seems to be how most recipes write it. I finally found a satisfactory-looking recipe over on Epicurious, modified it a teensy bit, and got cooking.

This was my first experience that caused me to realize how much I've come to love cooking from blogs and sites like Recipezaar (now Food.com), where people who aren't professionals make the dish and write it up. The instructions are clear to those of us who didn't go to culinary school, and if we have a question, we can easily ask. Things like "turn the burner from medium to low" don't usually get left out. While I'll probably make this again sometime, I'll make it from the recipe I'm typing up here, not the one I followed the first time.

RECIPE: Asparagus Risotto

Ingredients:
-1 1/2 lbs asparagus
-4 cups chicken broth (one box)
-1 tbsp butter
-1 large red onion
-2 cups arborio rice
-1/2 cup white wine
-2 tsp chopped fresh sage
-1 cup freshly grated romano cheese
-1/4 cup fat-free half and half
-water (about 2 cups)

Instructions:
1. Wash and trim the asparagus. Cut off the tips and set them aside. Cut the rest of the asparagus into inch-long pieces.
2. Combine about 2/3 of the asparagus with one cup chicken broth and one cup water in a blender. Puree and set aside for later.
3. In a large saucepan, melt the butter and sauté the onion over medium heat until tender. Add the rice and lower the heat to medium-low. Once the pan has cooled down a little, add the wine and stir until absorbed. (This should take about 4 minutes. If it takes less time than that, lower your heat more. If it takes longer, turn the heat up a little. The original recipe doesn't say anything about changing the heat so my first half cup of wine just cooked off immediately and I ended up using a whole cup and it was perfectly delicious, so if it cooks off too fast and doesn't actually absorb, don't worry about adding a little more.)
4. Add 1/2 cup broth and the chopped sage, again stirring until absorbed. Continue to add broth but the half cup, allowing each one to be absorbed before adding the next half cup. After about 15 minutes, add the asparagus pieces that you didn't puree, and continue adding half cups of broth. Once you've run out of broth, add two half cups of water in the same manner.
5. Increase the heat (back to medium) and add the asparagus puree. Stir often until absorbed.
6. Add the cheese and cream, stir thoroughly, and serve! Garnish with fresh sage if you would like.

Step 2. I took about 12 pictures of this and this was the least blurry one. Sometimes I think my camera hates me.

The rest of Step 2. It looks like those green smoothies that I buy at the store, but I wouldn't drink this. Just set it aside for now.

The rest of the asparagus, after 2/3 of the stalks were pureed. The only reason to separate the tips is to not puree them, so if you want to toss them in the bowl together now, that's okay. You probably don't even need a separate bowl to begin with.

Step 4. I loved how the red onion had a nice pink color that contrasted with the sage (and, later, asparagus) but most of the color disappeared after cooking for so long. Oh, well--it tasted delicious.

Still step 4--this is right after I added the asparagus. I'm glad I used the hugest pan I had, this made a TON of food!

Step 5: Asparagus/water/chicken broth puree added, and I'm now very worried that my pan will overflow if I stir too vigorously. Epicurious seems to think this takes 3 minutes to absorb. Like I said earlier, I like to have some direction about the heat. Mine did well after taking a while to absorb, so I guess it's okay.

Everything is added! It's ready! WOOOOO! Notice how the onions don't look nearly as pink anymore? After some refrigeration they lost their color completely.

The 'eat' step. It was rich and thick with plenty of asparagus flavor but it didn't overpower the grilled chicken that we ate it with. It's very warm and perfect for a cooler evening.

So, there's my first risotto! I was pretty happy with it, and I had leftovers for quite a while, which was nice. One night my mom and I had the leftovers with poached eggs, thanks to Kevin over at Closet Cooking. (I forgot where I'd seen it when I decided to try it, but went and found his post afterward. He deserves credit for such a perfect combination!) My mom was skeptical; I was not--the runny yolk complemented the creamy risotto perfectly and made for a great light meal. (Not that the risotto itself doesn't make a delicious light meal, of course.)

Given the amount of risotto I had left over, unless you're serving at least 6 people, I would probably recommend cutting this recipe in half or freezing half of your leftovers--the last of mine went bad before I could eat it! I was very sad about this. Now, though, I have a bag of arborio rice and an idea of how to make risotto, so I'll be looking for more tasty recipes. I think it would be fun to make this with three colors of asparagus--green, white, and purple. It would be so pretty!

Okay, so I've voiced my opinions about where I like to cook from. How about you guys? I'm assuming that if you're reading this you're not averse to cooking from blogs, but do you have difficulty with cookbooks or "professional" recipe sites? I'm sort of nervous about using epicurious again; both recipes I've followed have been less than ideal in the way of instruction, and I'm not sure there's anything I'd want to make that couldn't be based on something in one of the blogs I read. What do you think?

Oh, and I've also started a new thing with the comments. I'm not quite sure how it works, but I've enabled commentluv, which means that if you have a blog and leave a comment it'll link back to your most recent post with a title. I think it will also let me reply to comments directly, but I'm not sure. Let me know how you like it!

Asparagus (  蘆筍 in Traditional Chinese) on Foodista

Saturday, July 3, 2010

Sausage Stir-Fry with a side of Nostalgia

One thing that frustrates me as a person who likes to cook is the barrage of questions that I frequently have to face when feeding new people. "Where did you learn to cook?" "Where did you get this recipe?" Sometimes it isn't questions so much as assumptions--"Wow, your mom did a great job teaching you to cook!" The questions and assumptions on their own wouldn't be all that bad, but people always seem so disappointed in my responses. I learned to cook from reading cookbooks and following the directions. When I didn't know what something meant, I looked it up. More recently, I've expanded my skills using online tools (such as other blogs or sites like Recipezaar). Chances are, I found the recipe online; I think I have a total of two "old family recipes" that I can toss together from memory in my repertoire.

My point here is that, no, my mom didn't teach me how to cook, and I don't think that's a bad thing as so many people seem to. Why is it that everyone always seems disappointed when I say I got a recipe online, or that I taught myself with the help of numerous cookbooks and weeks of my life staring at the computer screen? My mom isn't a bad cook (though she would probably tell you otherwise)--I quite like her cooking, and when she does cook I think it's excellent, but she doesn't love it like I do. We never spent time in the kitchen when I was little with her showing me exactly how she makes a pie crust, and I think it's okay that I found out from a book.

However, the passion and interest must have come from somewhere, and that credit goes to my dad. He never really taught me a recipe, because I'm not sure if he ever really followed a recipe, but I do remember him busy making something for dinner and asking me if I could pit the olives, which was my favorite job because I ate most of them. (I got yelled at for this. Sorry, Dad.) He would chop up peppers for a stir fry and give me slices so that I could learn how much sweeter red peppers are than green peppers. There were nights that my mom and brother and I searched the refrigerator and cabinets and pantry for something to make for dinner, finding an old tomato, some peanut butter, three or four gallons of milk, huge jars of spices, and nothing else. Somehow, on these nights when there was nothing in the house and we were all too lazy to go grocery shopping, my dad could come home and whip up some simple, excellent meal out of our total lack of ingredients.

I never learned to be quite that resourceful, unfortunately--I either plan a meal out and go to the store and get everything I need, or I don't plan a meal and I go to the store wandering around until I find something that inspires me. I also never learned the knife skills that my dad tried to teach me; they're getting slightly better than they used to be but it still takes me at least 6 minutes to chop up a pepper. (I'm getting good at carrots, celery and rhubarb, though.)

So...nobody really taught me how to cook, and I find my recipes wherever I feel like, but I think my dad taught me how to play with my food and enjoy my time in the kitchen. He taught me to triple the garlic in any recipe I read and to like pepper far more than is perhaps healthy. And, without him, I never would have learned to buy twice as many olives as I planned to put in a dish. This recipe is based on one of those things that he used to come home and throw together, leaving the rest of us wondering where the ingredients came from but in the end quite satisfied with our meals. It's quick, simple, and delicious.

RECIPE: Sausage and Pepper Stir-Fry

Ingredients:
-1 package of sweet Italian sausages (usually contains 5 or 6) (If you'd like, use half a package of sweet and half a package of hot for some more variety--freeze the rest!)
-1 or 2 green peppers
-1 or 2 red peppers
-2 tomatoes
-1 large onion
-a whole lot of garlic
-some cooked pasta (homemade if possible!)
-ground pepper (or whole pepper in a grinder) (I like to use peppercorn medleys instead of just plain black pepper, but I don't really know what the difference is, so use whichever you prefer)
-extra virgin olive oil
-freshly grated romano or parmesan cheese

Instructions:
1. Heat some olive oil in a large frying pan. Once it's hot (a drop of water sizzles and evaporates immediately), add the sausages whole. Fry on each side for a few minutes, until lightly browned and partially cooked through. When you're not tending to the sausages, chop the peppers and onion (and, of course, garlic).
2. Remove the sausages from the pan and slice them into medallions. (If you don't fry them whole first, they won't slice properly and you'll get sausage-balls with little strips of sausage casing, and you don't want that.) Return to the frying pan. Lay as many flat as possible.
3. Fry the sausages until cooked through, flipping occasionally. Once they're done (or mostly done, since they'll still be in the pan) add the peppers, onion and garlic. Sauté until slightly softened, but still crisp enough to crunch a little when you bite it--you don't want soggy vegetables.
4. While the peppers and onions are softening, chop the tomato. Once everything else is done, add the tomato and a a few grinds of pepper, stir, and cook until the tomatoes are hot.
5. Serve over a bed of pasta with a generous amount of cheese to top each dish. Make sure to get some of the juices from the pan onto your plate--they're excellent!

Tasty sausages!

Yum! Mike and I use a ton of vegetables when we stir-fry--that's a BIG pan full of them. We usually end up thinking that we should have used less, but we never do the next time, and we fill up on healthy food and don't have room for ice cream. (Which is really sad--there's key lime and graham cracker gelato in the freezer that we keep being too full to eat.)

That looks like a ton of food, but it's mostly a pile of vegetables. We used leftover homemade whole wheat noodles, which wasn't true to my childhood memories at all but they were perfect with this dish.

I was originally going to post this on Father's Day, but then I had to go to my cousin's graduation party, and then I forgot about it, and then I realized that I never really posted anything for Mother's Day and I didn't know if it was okay to post something for Father's Day and not Mother's Day, and THEN I figured, well, my dad was always the cook, so it makes more sense, and I also gave my mom an awesome scarf and baked her a pie. So, consider this a very belated Father's Day post. (I think he also deserves credit for my tendency to cook with peppers, tomatoes and onions.)

How about you guys? Did you teach yourselves to cook, or did you have a parent or grandparent to show you the ropes? Any family recipes?

I hope everyone (well, everyone in the US) has a great 4th of July tomorrow--we're going to my family's annual grilled-meat-fest (seriously: sausages, steak tips, burgers, hot dogs, grilled chicken, and it's all too good to pass up--I think I'll skip breakfast).
Sausage on Foodista

Tuesday, June 29, 2010

pesto 3-in-1

This is another favorite that I discovered on Recipezaar ages ago, "ages" here being defined as "7 or 8 months." It's easy and delicious and I have a bunch of basil plants now because I want to make pesto out of basil I grew myself. This is ambitious and may never happen, but I remain hopeful.

You can buy pesto to make this, but I much prefer to buy a bunch of basil and pine nuts and romano and garlic and olive oil and make it myself. It keeps for about a week in the fridge if you seal it, or you can freeze it in ice cube trays and have little single-portion cubes of frozen pesto to melt whenever you feel is appropriate.

RECIPE: Basic Basil Pesto

Ingredients:
-about 4 cups loosely-packed basil leaves
-about 1/4 cup freshly grated parmesan or romano cheese
-about 1/3 cup pine nuts
-3 or 4 cloves of garlic
-about 1/4 cup extra virgin olive oil

Instructions:
1. Put everything in a blender or food processor and puree. If it's too dry, add small amounts of olive oil until you achieve your desired consistency.

Ooh, yeah--make sure to wash the basil first! I try to avoid including any stems. I'm not sure what the normal protocol on stems is.

You may find it easier to blend the basil before adding everything else, especially if you're using a blender. I used my mini-food processor and did the basil in small batches before putting everything else in the blender, but my blender is pretty lame and doesn't work so you'd probably be fine just putting everything in at once.
Once it's done, put it in a container and refrigerate until you're ready to use it! I love the bright green of a fresh pesto--you don't get that from the jarred varieties.

Okay, so that was pretty much the easiest thing ever, right? If you have the basil, it's absolutely worth it, but basil can get pretty expensive so you might want to skip the 'making pesto' step and buy pesto instead to make this chicken. Because it's SO GOOD. I call it "caprese chicken" because, well, it's tomatoes, basil and mozzarella, but I think "pesto chicken" works just as well.

RECIPE: Caprese Chicken
Ingredients:
-6 thin-sliced chicken breasts
-3 plum tomatoes
-pesto (above)
-a ball of fresh mozzarella (or a bunch of the tiny ones)

Instructions:
1. Pre-heat the oven to 400 degrees F. Wash the chicken and trim any excess fat off the edges.
2. Slather the pesto all over each chicken breast and place on a foil-lined baking sheet.
3. Place chicken in the oven for 15 minutes. Meanwhile, slice the tomatoes and grate (or slice) the mozzarella.
4. After 15 minutes, remove the chicken from the oven. Lay slices of tomato on chicken and coat with mozzarella. Return to oven for 3-5 minutes, until cheese has melted.
5. Remove from oven. Serve on a bed of pasta (with pesto!) and with some vegetables. Enjoy.

I scoop some pesto into a bowl and cover about 2 thin chicken breasts with it, then add more. This isn't properly coated--it's just to point out that this recipe does get quite messy at times.

Apparently I didn't get a good picture of how the chicken looked once it was thoroughly coated, and you shouldn't go by this because it looks less coated once it's baked. This is the 'slices of mini mozzarella' version.

The chicken comes out juicy and flavorful. I love trying to get everything in one bite--the chicken, pasta, tomato and cheese. I also tend to always serve this with asparagus, but that's just because I love asparagus!

Okay, so you can clearly see that I made 7 chicken breasts, even though I said 6. The package came with a different amount than usual. The thing here is to make a lot of leftovers--I was serving two people with this, but everything left goes to good use: it makes the best sandwiches ever! Which I'm ALSO going to tell you how to make! (In addition, the sandwiches are why I use thin-sliced breasts. If you don't care to make sandwiches, then you can use thicker breasts if you'd like, but I think this provides an awesome ratio of pesto to chicken.)

To make the sandwich, take your favorite kind of bread--I highly recommend rye in this situation, but your tastes may be different--and slather some of your remaining pesto on each slice, the same way you did the chicken in the first place. Grate some leftover mozzarella onto one side. Heat the leftover chicken, then put it on the inside, wrap in tinfoil, and toast (I use the 'dark toast' setting). Or, if you have a panini press, this would be a great time to bust it out! I, sadly, don't. These are excellent, sandwich-shop quality sandwiches that you make at home with leftovers from a really simple dinner.
Like this.

Holy blurry picture, Batman. Sometimes there's nothing I can do to stabilize my camera. But you can still see this, and just look at all the delicious layers in there. The pesto gives the sandwich a super creamy texture inside, and the bread is nice and toasty.

So, there you have it: how to make pesto, what to do with it once you've made it, and what to do with the leftovers. Now I'm starving! I wish I still had some left.

I also can't help but wonder how this chicken would fare on the grill--has anyone grilled pesto before? Does it work? (Maybe I'll try it and let you know.)