Tuesday, August 24, 2010

Taste&Create: 4 Ingredient Peanut Butter Cookies


Hi everyone! Look at me, blogging on a Tuesday like I'm supposed to. I was super excited to be paired with Dragon Musings for this month's Taste&Create. She has 3 kids, I believe, and does a lot of cooking with them that results in some pretty awesome things, like stegosaurus shaped calzones (which I can't find right now but I love dinosaur-shaped food so they must be delicious). She also posts a new flash game every Friday, which frequently consumes my weekends if I'm not careful, and menu plans on Monday which cause me to admire her ability to plan out what she's going to eat. I definitely can't do that. So check out her blog, but first look at how AWESOME these cookies are!

She emailed me to ask about my peanut butter and chocolate chip banana cookies, since she lives in Australia and they don't have peanut butter chips there. I, sadly, didn't know how to go about replacing things with peanut butter to get both tastes in there, but I asked her to let me know if she figures it out because I've been looking for a good peanut butter cookie recipe. She responded pointing out that she'd just posted a peanut butter cookie recipe the day before. Apparently I'd been too distracted to check my RSS feed, because I definitely would have noticed that, but I checked and was super excited to see that she had, and that they looked like the peanut butter cookies I remember eating when I was a kid. So here's the recipe! It's the most amazingly easy thing I've ever made. If you screw up every food that you ever cook, you can make these and they will be perfect. Just trust me.

RECIPE: 4-ingredient peanut butter cookies

Ingredients
-1 cup peanut butter (the kind with lots of ingredients, like Skippy or Jif, not the kind that is just peanuts or peanuts and salt)
-1 cup sugar
-1 tsp cinnamon
-1 egg

Instructions
1. Preheat the oven to 350 degrees F.
2. Put all the ingredients in a bowl and mix them until they reach an even consistency.
3. Roll them into balls and place them on a cookie sheet lined with wax paper. Squash crisscrossed fork marks in them (as pictured below).
4. Bake for 8 minutes.

Step 2, part 1: put everything in the bowl.

Step 2, part 2: Mix everything until it looks like this.

Step 3: roll into the balls so they look like the balls here, and then squash with a fork so they look like the fork-squashed ones here.

Right out of the oven. Isn't that the most gorgeous peanut butter cookie you've ever seen?

I was SO impressed with this recipe. Not only is it incredibly simple, but it tastes exactly like a peanut butter cookie should. The consistency is very cookie-like, which I didn't expect given the lack of flour--Mike just ate one and asked me how they seem so cookie-like without any flour. So, other bonus: gluten free! (Assuming the peanut butter is gluten free. I'm not sure. I couldn't find anything on the label saying it was, but I couldn't find anything saying it wasn't, either. And I'm sure if it's not there are brands out there that are.) The whole thing took probably 20 minutes, and most of that was fork-squashing because I'm a bit of a perfectionist.

The only problem I had with this recipe was actually the cinnamon. I feel blasphemous even saying that--anyone who knows me knows that I put cinnamon in EVERYTHING and a teaspoon of cinnamon in a pie recipe translates to two tablespoons, but it was sort of weird with the peanut butter flavor. I think, though, that this is my fault--it was only weird for two cookies, so either I got used to it quickly OR I should have mixed the cinnamon and sugar together first so that it was evenly integrated. Whoops. I should know to do things like that by now. I'm pretty sure that the cookies that tasted too strongly of cinnamon just had a higher concentration of cinnamon in them than the others and it would be fixed if I followed normal baking protocol instead of getting excited to take a picture that clearly showed the four ingredients. Oh well.

So go make these! You probably have all the ingredients. I got 17 cookies, so it doesn't even make so many that you'll have to give them away or get sick from eating only cookies for the next few days. And don't forget to stop by Dragon Musings and check out her flash games...er...recipes and such.

Friday, August 20, 2010

PGG's Panzanella

It seems like forever ago that I told you all to buy the Poor Girl Gourmet cookbook. Have you bought it yet? Because if you have, then this post is probably completely unnecessary, but if you HAVEN'T then I'm sharing my new favorite recipe with you. (I'm not quite sure if it's my absolute favorite, but it's definitely up there.)

Panzanella is a bread salad based in the idea of "cucina povera"--poor cooking. This also includes things like Minestrone, so I'm pretty sure Italians are just geniuses when it comes to cooking with not much in the way of funds. This is the recipe that I spent about an hour staring at after I bought Poor Girl Gourmet, trying to figure out exactly how it worked (bread salad? really?) and what "ricotta salata" was (and whether my grocery store would carry it).

There are lots of reasons to make Panzanella for dinner. Have some day-old bread? Excellent. Don't feel like actually cooking? Great! Leftover chicken? Wonderful. Tomato/basil/mint plants going crazy? Perfect. In the mood for a light dinner? Well, here you go! Seriously. Any excuse is good enough and this is the easiest thing in the world to make and toss together. If you don't have day old bread lying around, there's probably a rack of day-old baked goods at your grocery store. There isn't one at mine, of course, but that didn't stop me--I just sliced it up fairly thick and toasted it first. (I mean, toasting is sort of the same thing as making bread go slightly stale really quickly. Sorry if I just ruined toast for you.)

I only have one picture here because it's way too easy to require multiple pictures, though if you really want pictures of bread cut into cubes then I'm sure I can get some to you next time I make this.

Hmm. It doesn't look nearly as completely gorgeous as it tastes, though it looks better in the cookbook. This is also before I figured out the right setting on my camera. Anyway, if this picture doesn't look mouthwatering to you, ignore it and try the recipe.

RECIPE: Panzanella
Adapted very slightly from the Poor Girl Gourmet cookbook

Ingredients:
-1/2 lb day-old bread (the cookbook recommends ciabatta, which my grocery store doesn't sell--I went with a completely different country and used a multigrain boule, and I'm sticking with it)
-3 medium tomatoes (large on the vine tomatoes)
-1 medium shallot
-1/4 pound feta cheese crumbles (book recommends ricotta salata; again, my grocery store doesn't carry it, but I love the feta)
-1/4 cup fresh basil, chopped
-1/4 cup fresh mint, chopped
-2 leftover thin-sliced chicken breasts (or equivalent amount of cooked chicken), shredded (this is completely my addition and therefore you can leave it out for a vegetarian version)
-1/4 cup extra virgin olive oil
-1/4 cup white wine vinegar

Instructions:
1. Chop the bread and tomatoes into cubes. Put them in a large bowl. Mince the shallot and add that, along with the feta, basil, mint, and chicken. Let sit for about 20 minutes to half an hour.
2. Mix together the oil and vinegar in a small bowl. Pour it over the bread salad. Stir. Eat.\

It seriously doesn't get any easier than that, and I can't get over how good this is. I added the chicken to make it a more filling meal than just a salad, but it's absolutely not necessary. And I can't help thinking how easy it would be to adapt--tomatoes are out of season now? People are eating squashes? I can add some squash, okay. Cool. The best part? You're serving four people for under $10. If you buy things on sale, it's a lot under $10.

Of course I'm going to tell you again to go buy that cookbook, but also don't forget to check out her blog. It is just as lovable!

And speaking of blog love, you should also go check out Pixie's most recent post. She loved my blog so much that it inspired her to start documenting her food! I'm so flattered! And I must say her stuffed chicken breasts look delicious; she seems to have the "presentation" thing down much better than I do, too.

Friday, August 13, 2010

We're still not sure who killed Amanda Palmer, but I put her into a food coma and that's pretty awesome.

Hi guys! I promise there's food in here, but I have to be a fangirl for a moment. You'll probably learn more about me than you could from all the rest of my posts combined here. If you don't want to hear about me (or, well, about Amanda Palmer, really) you can scroll down to the recipe.

Today I'm going to take you into a fantasy world that is very much like the real world that you live in right now, except that you're me a few weeks ago.

There's a lot of music that I listen to, a lot of art that I look at, a lot of books and comics that I read. I'm not going to say these things that I do are the best things, but they're usually the things I love (okay, except for the music, my car doesn't have a CD player so I'm usually stuck listening to whatever's on the radio). With all the media that we have such easy access to these days, it's easy to not think about it most of the time--but I bet you all have someone, an artist, writer, musician, something, that really makes you think or care or push yourself or whatever. Think for a bit and I bet you'll come up with someone--a song that changed you, a poem that you memorized in grade school and never forgot, a book that suddenly made your mind click in the right way so that you're looking at the world in a way that makes sense to you now.

Now imagine that there's a thing that you do. Something that you do and know you're doing well and people love and appreciate--in my case, food. And that person who changed everything has a blog, and they write in their blog about a show that they're doing that--wow, is only about an hour away, that's not a bad drive at all. And there are rehearsals, and there are a lot of people, and the rehearsals are long, and they need to eat. And that person--your person--needs people to do your thing and bring it there. Amanda Palmer needed people to bring food to Cabaret rehearsals in Cambridge. My person. My thing. I couldn't not do it.

Most of the time when I mention her to people, I get a weird look and a confused "who?" in response, so for those of you giving me that look right now, she is a musical artist and force of nature. (I say "musical artist" because I really feel that in this case "musician" doesn't cover it.) Now, I didn't know anything about Amanda Palmer a year ago. I'd be giving you the same look that you're giving me right now if I were on the other end of this conversation, but that changed drastically in a very short period of time.

I don't know exactly how to describe Amanda's music. I think she files it as "punk cabaret," which may not make sense if you're not familiar with it, but I promise it fits. What I can say about it is that when I was introduced to her solo CD "Who Killed Amanda Palmer" (there's a book now, too) I was in a really bad place that I needed to get out of. I'm not going to describe it in depth--there was some depression, some anxiety, some trauma--I was broken. I'm not going to give Amanda all the credit here (I cannot express my gratitude to Mike for being there and talking me through things or just holding me when I break down in the middle of the night and he has to be at work at 6am--he has been my rock and he doesn't understand how much he's done). But when Mike's not around, or when I need to be alone, I listen to her music. And it was listening to her music that started making my brain tick the right way again, that pushed me to go beyond just crying to Mike and heal myself. It's not quite "empowerment," there's more to it than that, but I can't express it. And then at some point, she freed herself from her record company, and to celebrate she posted a free song for her fans. I listened to it and I cried and I laughed and I suddenly knew that despite everything, I was going to be okay. So that's what Amanda Palmer means to me. What she creates helped me find my own strength that I know was there all along, but not quite within reach, and jump up and grab it and hold on to it. At some later point, I started feeling depressed again, and with that strength that I'd found I was able to fight it off by myself without running back to antidepressants or just being miserable, and it felt great to be able to do that. Amanda, if you're reading this, thank you so much for doing what you do.

It's not like I'm completely better now. Honestly, people terrify me. I've always been shy around people I don't know, but for some reason in the past few years I get scared to go to parties. Social anxiety isn't fun at all. Mine's bad enough that, when Amanda made that blog post about wanting people to bring food, I was almost too scared to send an email about it. But I did, and I worked things out, and I thought about food and what kind of food vegetarians and vegans and people who can't eat rice-based products and carnivores all love, and I made a whole lot of falafel and I went to that rehearsal and fed the cast of Cabaret, including Amanda Fucking Palmer. (I hope people here aren't offended by swears, but I'm pretty sure that if you write a lot about her you have to include that. It may or may not actually be her legal middle name. Okay, it's not, but her lawyers apparently actually thought it was, and it belongs there. I can't censor her.)

Okay, okay, I'm getting to the food. Here. Sorry. I didn't turn into a burbling puddle of fangirl when I met her, so I kind of had to here, just because I needed to get it out. (I doubt it would even be possible to turn into a burbling puddle of fangirl around her--she's so down to earth and so real [in the sense that I usually expect people who are even remotely famous to have some manufactured personality]). She's an incredible person to hang out with. She asked me about me, and we talked about how cool it is that the internet lets people who are artists make a living off their art without "making it big" and how cool that is, and about food comas and crazy schedules, and I told her about how I sort of want to be her fiance when I grow up (oh, right, she's engaged to Neil Gaiman, if you didn't know that--somehow it seems right that my two favorite famous people/biggest influences are going to get married).


FOOD STARTS HERE.
You may have noticed up there that I said I made a whole lot of falafel. I'm posting the recipe, of course. I was asked for it. I'd be posting it anyway, but that seems important. I made double-batches of this recipe, and I made three double-batches, so essentially six of these. It was a lot of food. It was stressful for a couple minutes when I wasn't sure they were going to finish in time for me to put on real clothes and pack things up and drive to Cambridge. I'm going to tell you right off the bat not to make double-batches of this unless you have a HUGE food processor--it was quite difficult to integrate everything at times and required a lot of "pulse, stop, push stuff around with a spoon, put the cover back on, pulse again, repeat." If you don't have a food processor, that's totally okay too! It'll take a lot longer, but you can dice everything really small and fork-crush the garbanzo beans into it. And the best part of this recipe is that it's baked instead of deep-fried--no greasy oil making it heavy in your stomach and it's SO much healthier. YES.

RECIPE: Baked Falafel
Adapted from ChowVegan

Ingredients:
-1 15-oz can garbanzo beans (chickpeas)
-1 small onion (or large shallot), chopped
-2 or 3 cloves of garlic
-1 tbsp fresh parsley
-1 tbsp fresh cilantro
-1 tsp lemon juice
-1 tsp coriander
-1 tsp cumin
-1/4 tsp dried red pepper flakes (double for spicier falafels) (yes I know it doesn't pluralize like that just work with me here)
-2 tbsp flour
-1 tsp baking powder
-IF YOU'RE FORK CRUSHING: 1 tsp olive oil (adding this in the food processor will make it come out very liquid)

Instructions:
1. Drain and rinse the garbanzo beans. Leave them in a colander in the sink until you use them so they drain adequately; you don't want to add too much extra liquid here.
2. Slice the onions, peel the garlic, and throw them both into the food processor along with the parsley and cilantro. Pulse until everything is finely minced; it will sort of look like a coarse crushed ice type of dessert.
3. Pour in the garbanzo beans and everything else (coriander, cumin, lemon juice, red pepper flakes, flour, baking powder). Using a wooden spoon, try to stir the mixture enough to get the garbanzo beans at least slightly integrated with the onion mixture--this will probably be a lot easier in single batches than it was in double batches.
4. Turn on your food processor and let it do its thing, stopping frequently to mix things around and make sure it's fairly evenly textured. It won't be perfect, but if you don't do this you'll end up with hummus at the bottom and mostly-whole-garbanzos at the top. Be careful not to let it go too long, or you'll just end up with hummus.
5. Heat your oven to 375 degrees (F). Take out and oil some cookie sheets. Roll the falafel into balls and press them to make patties, placing on the cookie sheets. They don't spread like cookies, so you can put them pretty close together, but keep in mind that you do have to flip them halfway through baking so if they're too close that gets difficult.
6. Bake your falafel for thirty minutes, taking it out and flipping them over halfway through.
7. When your falafel is done, let it cool for a few minutes, then serve in a pita with lettuce, sliced tomatoes, and tahini sauce. (Adding hummus is a common practice, but it's one that I don't understand since falafel is pretty much hummus that's been processed for a shorter time and then cooked. If you want hummus, you can add it.)

The tahini sauce recipe that I used was perfect and can be found here. I followed it to the letter, so there's not much point in my typing it up again (it's late and I'm sort of tired).

Step 2. If you're using a food processor, slicing things like this works--if you fork-crush the garbanzo beans, mince everything really really tiny. (Instructions for fork-crushing are at Chow Vegan, linked above.)

Step 2, continued. This is just the above stuff after being processed for a few seconds, but it looks so fresh and delicious that I had to take a picture. I don't know why it looks so dessert-like to me.

Step 3. Everything else, added.

Step 4. If you look closely, you might notice a whole garbanzo bean or two. That's okay--I just crushed them with the spoon as I came across them. It's better to have more texture than to turn your falafel into hummus--can you see on the right how it sort of already looks like hummus on the bottom?

Step 5. This was a little closer than they should be, but like I said, only because it was difficult to flip them.

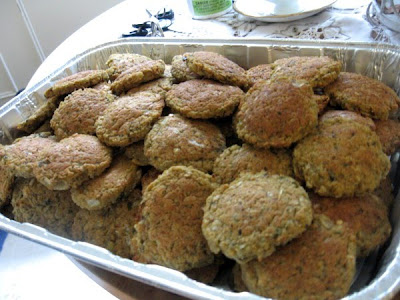
This was a lot of falafel.

It got eaten, though!

By Amanda Palmer! (Sorry I'm pointing at your boob, Amanda. I was trying to point at the sandwich to say "I made that!" but I guess I couldn't really tell where the sandwich was.) Are you familiar with The Princess Bride? You know that part where Buttercup kisses the King because "he's always been so kind to her, and she's killing herself once they reach the honeymoon suite" but he's too excited that she kissed him to process what she said and just says "Isn't that nice. SHE KISSED ME!" Well, that's sort of what it was like, except Amanda wasn't planning on killing herself or anything. It was just sort of awesome and surreal, so despite the fact that I'm all scrunched up and the camera added like 50 pounds to me (that's a lie, maybe 10) it's my favorite picture ever. (Photo credit to someone in the cast who took the picture with my camera. I'm terrible with names so I can't tell you who.)

And, of course, the rest of a hungry cast, all of whom were SUPER COOL. (Photo credit to Amanda's phone, I'm not actually sure who took the picture. Someone in the cast. Amanda posted in on twitter.)

And then Amanda went into a food coma power nap and told me it wasn't creepy if I took a picture as long as I promised it was sexy. I think this is a pretty sexy nap picture, don't you?

OKAY I'm pretty exhausted now because it's been a busy few days and is going to continue to be a busy few days, so I'm gonna leave you with that. And I'll probably come back and edit this post to add some appropriate links tomorrow. And I know I said I'd post Friday and it's technically Saturday, but I'm still awake so to me it's still Friday. ALSO THIS IS VERY IMPORTANT: since it's technically Saturday, it's now officially Mike's birthday! Wish him a happy birthday in the comments, he totally deserves it. HAPPY BIRTHDAY MIKE I LOVE YOU.

Oh, one more thing. If you're anywhere in the Boston area--actually, within four hours of the Boston area, go see Cabaret. I saw a little bit of rehearsal and it was amazing. I can't wait. Buy tickets here.

Tuesday, August 10, 2010

Pineapple and Red Onion Simmer Sauce, by ME!

I'm excited! I invented this all by myself. It started as a "oh no, what should I do with this chicken" that turned into one dish, and after eating that one I decided I wanted to invent something similar but not quite as cloyingly sweet. It came out really well, so I'm posting the recipe! However. Since I was making this up as I went along, I don't have exact amounts for anything--I just poured in whatever seemed like a good amount and added more later as it developed. I'm going to estimate the amounts that I used (I tried to do this as I was cooking so I could post it), but if it seems like a lot, use less and add more as you feel like it. And if you add the amount that I said and taste it and think it needs more, by all means, add however much you want!

RECIPE: Pineapple and Red Onion Simmer Sauce (for chicken or pork)

Ingredients:
-1 can pineapple (I used chopped so I could decide myself how crushed it was; you can use crushed if you want, and I'm sure it would still be delicious if you left it in chunks)
-1 medium red onion
-2 tbsp soy sauce
-1 tsp sriracha chili sauce ("rooster sauce")
-3 tbsp pineapple preserves (if you can't find these, you could either add another flavor with different preserves or just add some sweetener--it balances the salty and spicy flavors from the previous two ingredients)
-ginger, to taste (more ginger than the other things)
-a large pinch of cumin
-a dash or two of paprika
-2-3 chicken breasts or pork chops (probably 3-4 pork chops? they're smaller), cubed

Instructions:
1. Slice the onion into discs and cut each disc in half so you have half-circles of onion. This way, you'll have strips of onion in the sauce. Yay.
2. Pour the can of pineapple into a medium saucepan. If you want to crush it, use a potato masher to crush it to your desired amount of crushed. Add the onions. Put the pan over medium heat and simmer until the onion softens.
3. Add the soy sauce, sriracha sauce, and spices. Stir to incorporate. Continue to simmer until the onion is completely limp and the liquid has reduced considerably.
4. While that's simmering, chop your chicken or pork and toss it into a large frying pan. Brown lightly.
5. Once the chicken/pork is cooked through, add your sauce. Allow to simmer, infusing the meat with flavor, for 5-10 minutes. If all the liquid simmers off, stop cooking! You don't want to dry out the meat.
6. Serve over brown rice and enjoy!

Step 2: pineapples and onions, simmering away.

Step 3: this is the color that everything was. I didn't notice until now how much the liquid had reduced; I'm so used to reducing things that thicken that I was getting frustrated with it. It worked well, though!

Step 5: I used two pretty large chicken breasts and could easily have used another with the amount of sauce that I had.

Ta-daa! It really was excellent with the brown rice--I know it takes twice as long to cook, but usually if you're cooking a full meal and start the rice at the beginning, it'll be done right around when the rest of your food is done (or way sooner! luckily it retains heat well). Taking the health benefits into consideration (along with the taste), it's definitely worth using brown over white!

The meal that this was based on was mostly made of the pineapple preserves--I used about half a jar, mixed with some pineapple juice and soy sauce (and the rest of the stuff listed up there). It was quite good--tasted a lot like sweet and sour sauce that you'd get at a Chinese restaurant, but better. It had the same sticky-sweet feel to it, though, and that made me want to make a healthier version. If you want to reproduce the original one, use pineapple preserves instead of canned pineapple, dilute it with pineapple juice, and do everything I did here except the simmering it part. Oh, and leave out the onions! I didn't have an onion to put in it, even though I really wanted one. (So you don't have to leave out the onions. Actually, though, if you include the onions, you'll probably want to simmer it for a bit to soften them.)

This version didn't taste anything like sweet and sour sauce. It tasted like fruit and chicken, with a little bit of bite to it. The flavors mixed incredibly well and nothing was too overpowering. The sweetness actually made the leftovers an excellent breakfast--I normally eat leftovers for breakfast, but I felt slightly less weird about it this time since it tasted like something normal people would eat for breakfast. So this is an anytime meal!

And on a really exciting note, I found a setting on my camera that takes much less blurry pictures! So you may notice that I'm less frustrated with blurry pictures in the future. These ones all came out nicely, YAY!

I'll be back on Friday...with THE MOST EXCITING POST OF ALL TIME. I'm serious. (It will probably include people!)

Friday, August 6, 2010

AHHHHHHHHHHHHH!!!!!!!!

I promised a post today, didn't I? Was I specific? I hope I wasn't specific. I intended to post my new favorite summer food (from Poor Girl Gourmet), but...well, last week, I went to water my tomatoes around 2 in the morning and the faucet for the hose broke and I couldn't turn it off, so we ended up having to turn the water in my side of the house off completely in order to avoid having a constantly-running hose until the plumber came. This happened...Friday or Saturday night (well, Saturday or Sunday morning). I ran away to Mike's house because not being able to use the bathroom near my room is kind of disconcerting when I wake up in the middle of the night and, well, forget that I can't use that bathroom. I returned to my house yesterday to sit around and wait for the plumber to come (he was supposed to come yesterday). He never showed up. I called and left a message asking if he could come today and for some reason I thought he was going to, but he didn't. So I wasted two days sitting around waiting for a plumber (and canceled plans with a friend I haven't seen in ages) and promptly ran away to Mike's house again, where I don't have to worry about whether or not there is water, because there is water.

However. I left my cookbook at home. Which means I can't share the recipe I planned to share, so you're getting pancakes that I forgot I had pictures of.

See? Pancakes!

These are Strawberry-Almond-Chocolate Chip pancakes. I adapted them from my Banana pancakes that I posted a long time ago. Strawberries mix in differently (and they're much more liquid), so you get a much denser pancake here--you could probably add a little bit more flour if you want them fluffy, but despite my usual dislike for dense pancakes, these were quite delicious. The recipe is just going to be for strawberry pancakes, though, because I honestly have no idea how many chocolate chips were added. Lots, I'm guessing--I always just pour them in until it looks like a good amount. Mike sprinkled slivered almonds on top of the pancakes after I poured them into the pan--they got slightly toasted and added a great texture to our breakfast!

RECIPE: Strawberry Pancakes

Ingredients:
-1 cup flour
-4 tsp sugar
-2 tsp baking powder
-dash of salt
-1 large egg
-1/2-1 cup milk (less for fluffier pancakes, more for denser)
-2 tsp almond extract
-2 tbsp vegetable oil (or melted butter)
-1 pint strawberries
-Chocolate chips (optional)
-Slivered almonds (optional)
-Butter (for the pan)
-Maple syrup

Instructions:
1. Mix dry ingredients (flour, sugar, baking soda and salt) in a small bowl.
2. Mash the strawberries in a large bowl until they are liquidy, but with plenty of strawberry pieces remaining.
3. Add the egg. Mash it in with the strawberries.
4. Add 1/2 cup milk, almond extract and vegetable oil/melted butter to the strawberry and egg mixture. Stir.
5. Add the flour mixture to the strawberry mixture. If you want to add chocolate chips, this would be the time to do it. Stir until combined. Don't over-stir, a few clumps of flour are okay.
6. Add more milk, stirring, until the batter reaches your preferred consistency. The more liquid your batter is, the denser your pancakes will be.
7. Cook pancakes in a well-buttered frying pan over medium heat. (I use a 1/4 cup measure to pour the right amount of batter into the pan.) If you want to add slivered almonds, sprinkle them on top of the pancake as soon as you pour it into the pan. Flip when the sides look solid and the bubbles on the top are beginning to pop.
8. Transfer cooked pancakes to a plate and cover with a clean dishtowel to retain heat. Continue repeating steps 7 and 8 until all the batter has turned into pancakes.
9. Top with real maple syrup and enjoy!

If you have an absurdly good memory and have been reading my blog since February, you may notice I basically copied and pasted and changed a few things. But, I mean, it's basically the same recipe--just a different way to enjoy it! (And it's 11:30 and I'm lazy.) But really, I do love versatile recipes, and I feel like you could adapt this to fit a lot of different fruits (right now I would really love some nectarine pancakes!)

I don't know when I'll be back home with my cookbook (my staying there hinges on the water getting fixed) but I'll be back here, at least, on Tuesday. And I'm warning you in advance--you should all get REALLY EXCITED for next Friday's post. It's gonna be exciting. I can't wait :D

Wednesday, August 4, 2010

Buy This Cookbook: Poor Girl Gourmet

Hey everyone! I've been trying recently to actually have a regular update schedule. It wasn't a conscious effort at first, just an idea to post twice a week, and I looked back and realized that, the past few weeks, I'd posted on Tuesday and Friday. So before I posted on Friday, I said, "cool--I'm gonna stick to that schedule." Of course it only lasts one post. OF COURSE. Yesterday, I woke up with a combination sinus-allergy/TMJ headache which even Excedrin, Claratin D and a nose rinse thing couldn't help, an awful stomachache every time I ate anything, and 24-hour narcolepsy. The post, needless to say, didn't happen. So it's happening today, and another one will happen on Friday, and I'll try to stick to a schedule. (Once the semester starts up, though, I can't promise anything.)

This post does not include a recipe. This post exists because I feel a moral obligation to tell you when I find something awesome food-related (like my garlic zoom). I suppose I should mention--nobody's giving me free stuff or paying me to review things. I just want the world to know about faster and more fun ways to mince garlic, and now, much cheaper ways to eat gourmet food at home.

I met up with a friend in Harvard Square a while ago, just to hang out and walk around and talk about stuff. It ended up being one of those July days where it feels like the air is starting to boil, so we stayed indoors, hopping from a bookstore to a tea shop to a store with weird stuff to a bar where the World Cup was on TV. On one of these hops, we walked by a bookstore (you can't not walk by a bookstore at least 7 times in Harvard Square). I looked in the window and saw this book on display and needed to have it. Because...well, because I'm a college kid, and Mike's a med student, and my mom's paying two tuitions, so while occasionally it's nice to go all-out and prepare something super expensive, it's not a good habit to be in. So I go into the store. I buy the cookbook. I bring it home and read it through and daydream about the recipes.

Photo Credit: Amy's email signature

I had no idea that Poor Girl Gourmet was a blog, but given my inclination toward cooking from blogs, I was happy to find that it was. You should all go read her blog, if you don't already. But you still need to buy the cookbook. Why? Well, the recipes in the book aren't on the blog, so you can't get them on her site. And sometimes it's nice to have everything printed on a nice pretty piece of paper in front of you--it's way easier to flip through a cookbook for dinner inspiration than it is to read a million blog posts.

Each recipe is categorized according to course (main dish, salad, dessert, etc) and expense. I feel it's important to mention that these recipes all serve 4-6 people (or more, sometimes). They're divided into "Under $5," "Under $10," "Under $15," and at the end there's a section for "splurges." There's also a little section on wine, which I imagine would be great if I planned on entertaining someone who knows anything about wine (since I don't).

Now, the best part about this cookbook (at least, I think) is that reading it and using it, you begin to get a sense of how it works--how cooking gourmet for almost no money works. And, after a little while, you adapt the recipes, keeping them inexpensive. And a little while after that, you start to develop inexpensive-cooking habits even when you're not basing it off a recipe you found in the book at all. It changes how you look at making dinner and makes you realize that you don't need to spend $30 on groceries to make something everyone will love, and you stop doing that. And then you have more money than you've had in months and a few new favorite recipes to whip up on a hot summer day.

I already have food spills on half the pages. And you'll save the money on food that you spent on the book within a month, at least.

Poor Girl Gourmet: Eat in Style on a Bare-Bones Budget, by Amy McCoy. Click here to buy the cookbook, and click here to visit her blog (and DO BOTH!)

Over time, I'll be sharing with you two or three recipes from this cookbook (with Amy's permission) to give you an idea of how awesome it is.